EXoverland
EXoverland AeroPress XL Coffee Maker
EXoverland AeroPress XL Coffee Maker
Regular price
R 1,750.00
Regular price
Sale price
R 1,750.00
Taxes included.
Shipping calculated at checkout.
Quantity
Couldn't load pickup availability
EXoverland AeroPress XL Coffee Maker
AeroPress XL Coffee Maker features and specifications
- Incredibly easy to use
- Highly versatile – can make short, intense shots and long filter-style brews
- Produces a clean cup of coffee with minimal sediment thanks to a small paper filter
- The ideal AeroPress for brewing multiple cups at once
- Still portable despite the increased size
- Entirely manually operated – ideal for camping or travelling as no power is required
- Carafe’s Tritan™ plastic is BPA free, durable and very easy to clean
- Made from Polypropylene and medical grade thermoplastic elastomer
- BPA, BPS and Phthalate Free
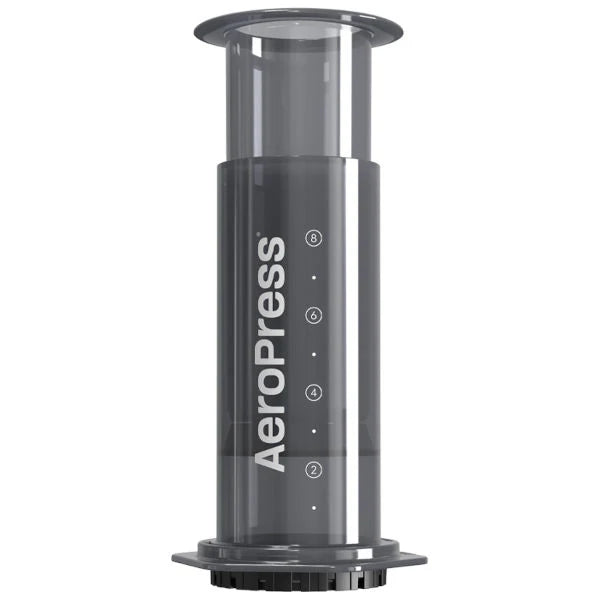
- Capacity: 600ml (AeroPress XL); 600ml (included carafe)
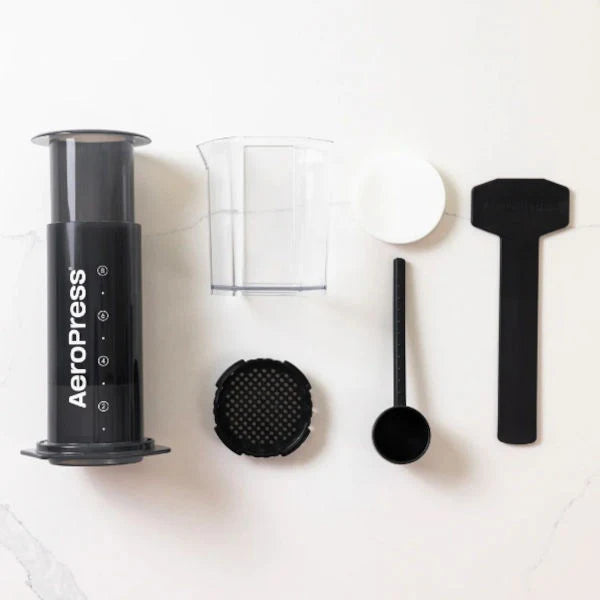
Included in the AeroPress XL box
- An AeroPress XL coffee maker (plunger with seal, chamber and filter cap)
- An AeroPress carafe made of clear Tritan™
- A scoop that can be used to measure out the coffee if you don’t have a scale (though we have a wide range of scales we’d recommend)
- 100 microfilters (which can be reused up to 20 times each)
- A perfectly sized stirrer
How to use the AeroPress XL
There is no limit to the number of different ways you can use the AeroPress. The internet and Youtube are littered with examples of how you can use it to make any kind of coffee you want.
What follows is the “traditional” two-cup brewing recipe:
- Put some water on to boil
- Put a paper filter in the filter cap and attach it to the coffee chamber
- Run some of the freshly boiled water through to rinse the filter
- Grind your coffee to a medium-fine (slightly coarser than espresso) – if in doubt, lean to coarser rather than finer
- Put the chamber on top of the included AeroPress™ carafe, a cup, or whatever you want to make your coffee in – just make sure it’s big enough for the amount of coffee you plan to brew
- Put ~30g of (preferably freshly ground) coffee in the chamber – this is about one scoop using the AeroPress™’s included scoop, but a scale is more exact and consistent here
- Fill the inner tube (the plunger) with just-off-the-boil water to around the “8” marker on the chamber – ideally, you want to weigh out around 500ml of water for this dose of coffee, but if you don’t have a scale then filling the chamber to this mark is a decent alternative
- Stir for around 10 seconds using the included stirrer to make sure all the coffee and water has had contact
- Insert the plunger into the top of the chamber – this will create vacuum, limiting the amount of water that passes through the filter while your coffee brews
- Wait for your coffee to brew – typically between 1 and 2 minutes depending on the level of extraction you want
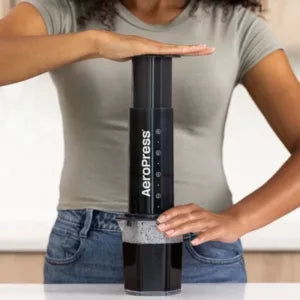
- Gently push the plunger down – you don’t want to rush or force this step; administering an appropriate amount of pressure, it should take you about 30-45s to completely push the water through